How to start modding and unlock decks for 2012
Contents |
Download the Deck Editor, Rev
- Download jstauffer's deck editor. Extract it somewhere convenient.
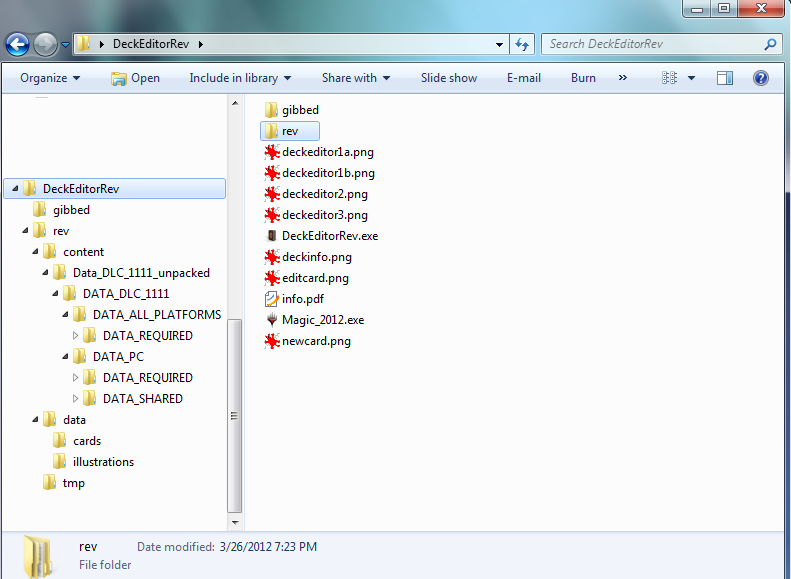
- Run the deck editor, and it should create some new directories, such that it looks something like this:

Importing Existing Cards
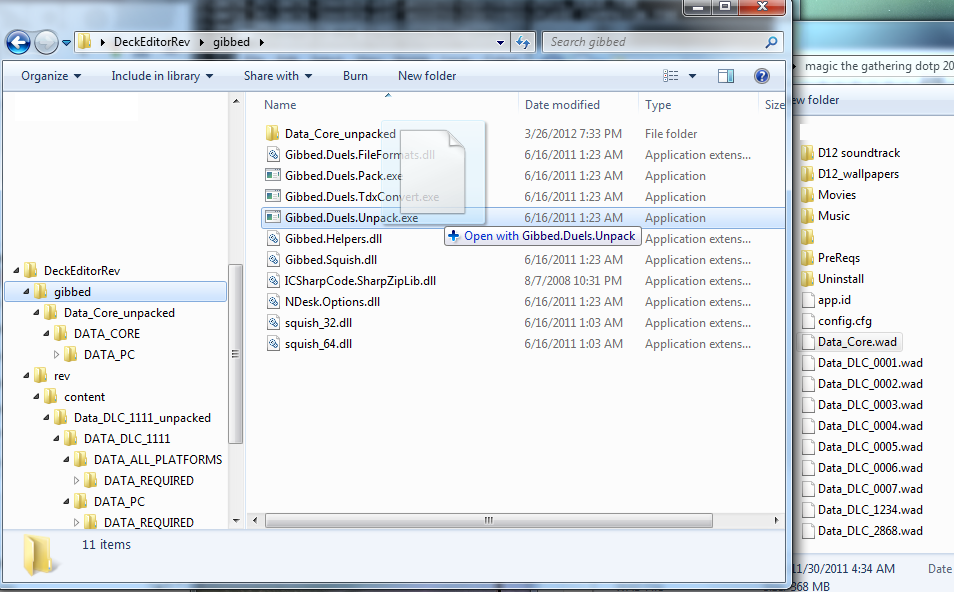
- Open the gibbed folder and, in a new window, open your DoTP2012 folder. Drag the .wad files one at a time onto the Gibbed.Duels.Unpack.exe file, as shown here:
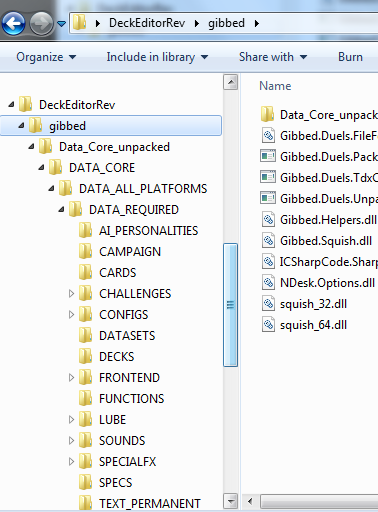
- Once complete, each of the .wad files should have an unpacked folder structure inside the gibbed folder something like this:
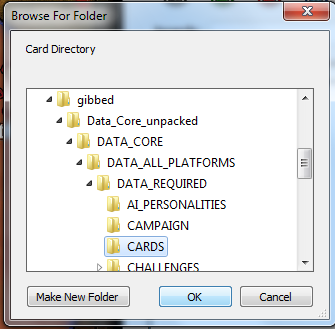
- Go to the Tools menu in the deck editor, and choose to Load Cards. When it asks for a directory, choose one of the cards directories you unpacked, like so:
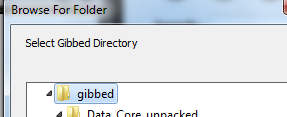
- You should now have a bunch of cards available in the deck editor, albeit without corresponding images. To load the images, choose Tools->Load Illustrations. When the editor prompts you to select the gibbed directory, point it to the gibbed folder, like this:
 When it prompts you for the illustrations directory, point it to the DATA_PC\DATA_SHARED\ART_ASSETS\ILLUSTRATIONS directory of the wad you want to import, like this:
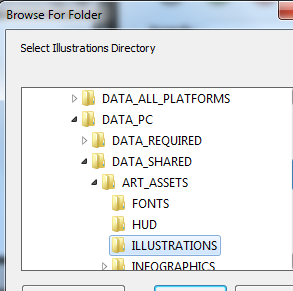 Importing a large number of images can take quite some time, but when it is complete, your imported cards should now appear to have their full art. This step is purely optional - you can build decks using the imported cards without importing the art, you just won't see the art inside the editor.


Creating New Decks
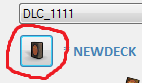
- To create a new deck, choose File->New Deck. Click the deck icon next to the deck's name
 , and fill a suitable name for the deck. It is also a good idea to change the UID to a number that is unlikely to be used by anyone else
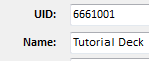 . Now, choose File->Save Deck As from the menu and give the deck a unique name
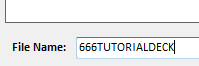 . Add some cards, then save your changes using File->Save Deck. To render the deck playable in DoTP2012, select Tools->Send Content. The deck editor may ask you for the gibbed directory (use the same one you used before, inside the deckeditorrev folder) and your DotP2012 folder. Follow the prompts and look for a message indicating success, like
 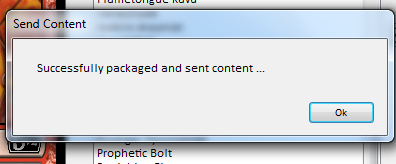 . Start your game and try out your new deck!


Creating New Cards
- To create a new card, choose Tools->New Card. The value in the card field will be used to name the card's XML field, so avoid spaces and other non-alphabetical characters. The title field will be used to title the card, so pay special attention to capatilization and punctuation. For this example, I'm going to make a creature card - it is important to tell the editor what sub-types my creature has, and this is done by clicking here:


It is important that each identifier is on its own line, and there should be no trailing line-feeds (don't press enter after the last one). Supertypes appear before the card-type (legendary, basic, tribal, etc), where sub-types appear after the card-type (human, wizard, etc). Press the close button when you're satisfied with the choices. To set an image for the card, double-click where the image should go and navigate to a file on your computer. The game may prompt you for the gibbed directory (again, use the one inside the DeckEditorRev folder). I want my creature to return a card from my graveyard to my hand when I play, and I know that Eternal Witness has a similar ability. So, I right-click the area under the mana signs and choose New Ability->Triggered  and look for a template named ETERNAL_WITNESS or something similar.
  Now, I change the text to reflect the new card and press OK. Finally, my card is just the way I want it, so I press OK to save it.
  When you press OK to save the new card, the editor may ask you whether or not to include the illustration in your content pack. The correct answer to this question is generally yes. My new card is now ready to be included in decks.